We will create here a photo-realistic lightning effect...

In your Adobe Photoshop, create a new document 700px wide, 200px high and fill it with a black and white gradient from top to bottom, to do this, select your colours and pick the gradient tool, hold down shift and draw a line from top to bottom :

Now on the menu, go to filter > render > difference clouds and then Press ctrl+i to invert the clouds. Press ctrl+L which brings up the levels window, and slide the center arrow all the way to the right:

Now drag this layer on to your main document, click edit > free transform and rotate the lightning to a suitable angle and line it up with his hands :
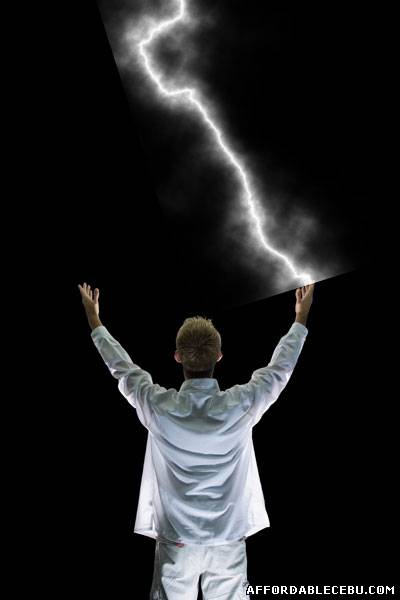
Now, right click the layer in the layer window and choose ‘blending options’, change the blend mode to ’screen’. Now grab yourself a fairly large feathered eraser brush (I used size 100) and begin slowly deleting the sharp angles of the lightning layer, once done it should look like this :
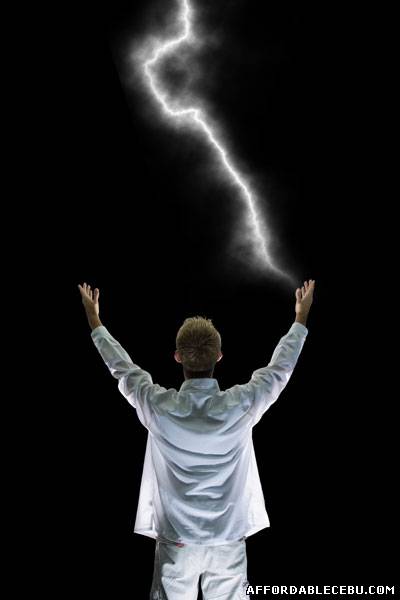
Now you need to go back to your other document where you created the lightning, press shift + ctrl + z a couple of times till you are back at the gradient, repeat the steps above to make more lightning and drag them on to your main document – I created 5 lots of lightning for this picture but it will depend on your image and preference how many you make:

You could leave it there if you wish, but who wants boring white lightning when we can have it colored? To colorize it, select one layer of lightning and go to image > adjustments > hue/saturation and use these settings :
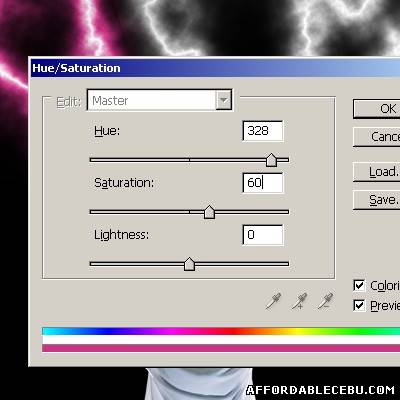
Do this on all the lightning layers and you will end up with this image :

Looking good, now the finishing touch. Zoom in and with a brush paint some color the same color as the lightning over the top of his head and arms, like so :

Right click this layer in the layer window, select ‘blending options’ and change the blend mode to ‘overlay’ :
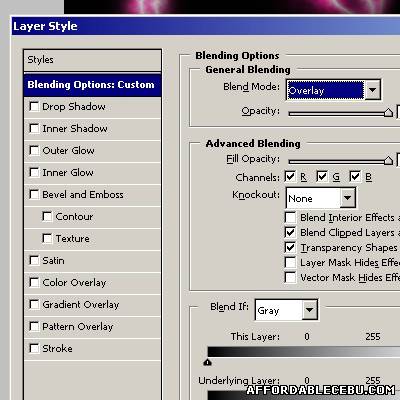
And now you’re done! that final step just adds some reflected light to add a bit more realism to the scene :

So easy isn't it? Sayon ra i-follow. You can download psd file tutorial here. Click Me!
( Lightning Graphics using Adobe Photoshop )
Don't forget to say thank you below...